Here are some tips and tricks we use for finishing the kits. We hope you find them helpful.
General Assembly
These are delicate parts, please take your time and trim and or sand off any areas that the supports were attached to. Pre-fit the pieces together, do not force them or they will break. If they do not fit sand or file the mating suffices until they fit together. Before painting delicately wash with a soft brush (toothbrush) soap and warm water, let dry and paint.
Finishing Clear Parts
Start by sanding any nubs off. I start with a 100 grit to get rid of the print lines then progressively move up to higher grit sanding. I dry sand with 100, 180, 220,320 then wet sand with 400, 600, 1000 and finish with 4000. Clean all the parts with a soft toothbrush, warm water, and dish soap, rinse thoroughly, and let dry. Next use a clear gloss coat on both sides, make sure to spray straight down as much as possible or the piece flip over. Let dry completely, I let them dry for a day and then clear the other side. If you do get a bad spot you can wet sand and spray again.
Decals
If the decals do not stick after you peel off the back it means there is still a very thin film on the back yet. I use an X-Acto knife and lightly scrape back one of the corners, then peel it off with tweezers.
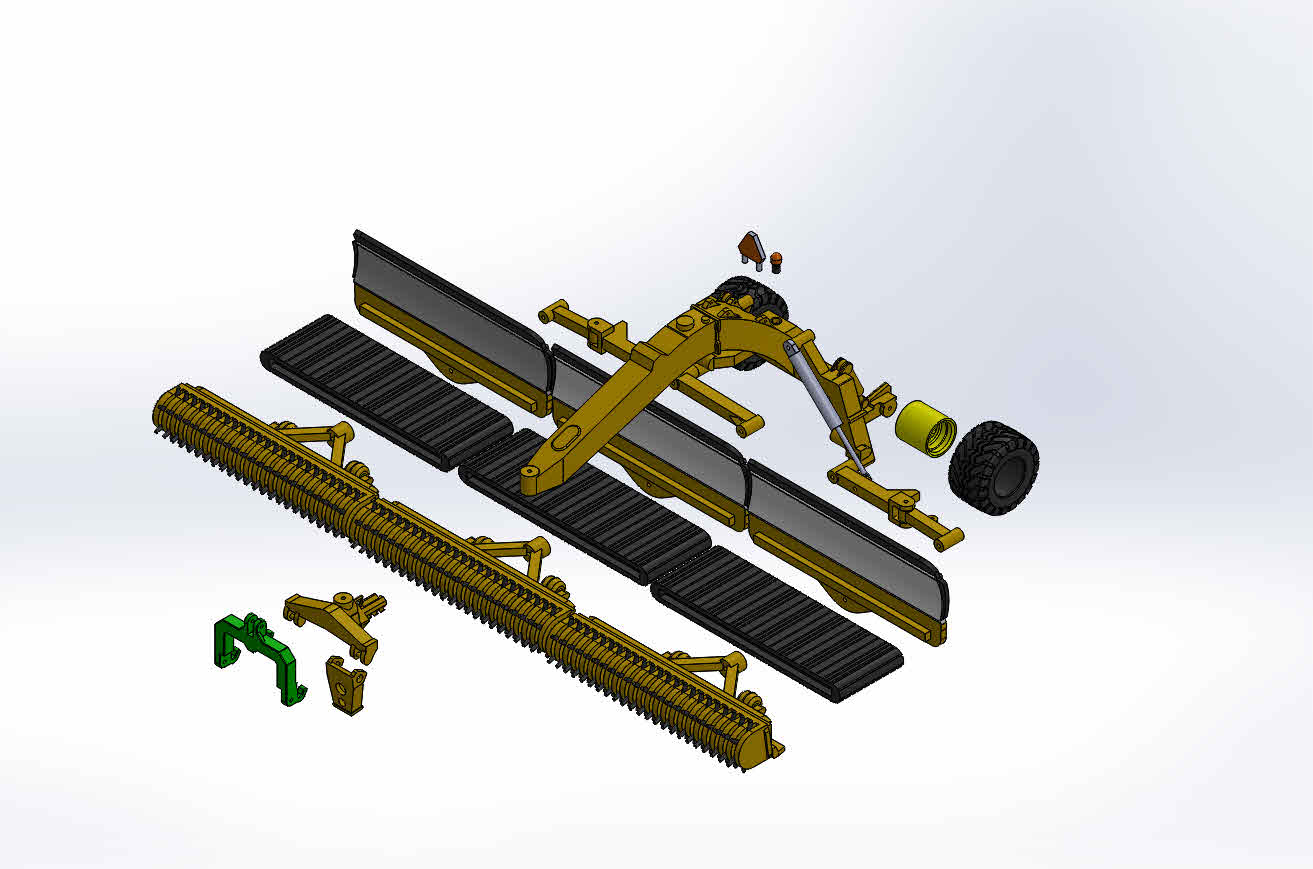
Assembly Directions
4 Wheeler Assembly Directions Exploded View
5820 Chopper Directions Exploded View
5830 Chopper Directions Exploded View
Running Gear Assembly Directions Exploded View
9 shank off-set kit assembly directions
Videos